

SHT 21/HTU 21 – Measure Temperature and Humidity with Arduino + OLED/LCD [DigitSpace.com]
Hello everyone, and welcome to another tutorial Sponsored by: DigitSpace
Get the products used: GY-21/SHT-21/HTU-21 Temperature and Humidity sensor
0.96″ OLED display 128×64 Blue/Yellow
So this tutorial is about interfacing the SHT-21 or HTU-21 or GY-21, call it as you want, temperature and humidity sensor, we gonna see how to test it first then how to use it with OLED and LCD i²c screens, the humidity will be displayed in %RH and for the temperature it will be with (°C) Celsius and (°F) Fahrenheit.
Here are some quick data taken from the module datasheet:

*The accuracy changes depending on the conditions:

So this is the module (click pictures to expand):


As you can see the module has 4 pins (Vin/GND) are for power using 3.3V/GND from Arduino board, and SCL/SDA for i²c communication.
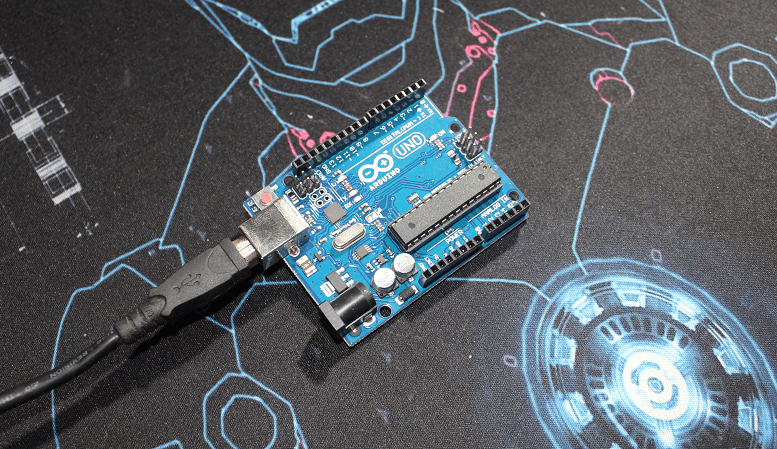
Test 1
For the test 1 and the rest we’ll need of course an Arduino board, here I’m using the UNO board, you can add some jump wires and a breadboard… And we gonna test the module with the serial monitor and check the values measured by it.
Wiring
This is the direct wiring, the module is powered by 3.3V and for i²c interface we need SDA/SCL wired with A4/A5.

Test 0
Here before I use any library/code or add other modules I prefer to test if the modules works first, to do so, wire the module and upload the i²c scanner code from the Arduino Playground:
Get the Code from the Arduino Playground
Scanner i2c code:
|
1 2 3 4 5 6 7 8 9 10 11 12 13 14 15 16 17 18 19 20 21 22 23 24 25 26 27 28 29 30 31 32 33 34 35 36 37 38 39 40 41 42 43 44 45 46 47 48 49 50 51 52 53 54 |
#include <Wire.h> void setup() { Wire.begin(); Serial.begin(9600); while (!Serial); //wait for serial monitor Serial.println("\nI2C Scanner"); } void loop() { byte error, address; int nDevices; Serial.println("Scanning..."); nDevices = 0; for(address = 1; address < 127; address++ ) { // The i2c_scanner uses the return value of // the Write.endTransmisstion to see if // a device did acknowledge to the address. Wire.beginTransmission(address); error = Wire.endTransmission(); if (error == 0) { Serial.print("I2C device found at address 0x"); if (address<16) Serial.print("0"); Serial.print(address,HEX); Serial.println(" !"); nDevices++; } else if (error==4) { Serial.print("Unknow error at address 0x"); if (address<16) Serial.print("0"); Serial.println(address,HEX); } } if (nDevices == 0) Serial.println("No I2C devices found\n"); else Serial.println("done\n"); delay(5000); // wait 5 seconds for next scan } |
Once the code is uploaded, open the serial monitor you’ll be able to see that a device is found and its address.

Library
Now we can proceed to our next steps, test the module and check its values…
This the library I used you can download it from Github: Download the SHT-21 Library by e-radionica.com. Or you can download it here.
Once the .ZIP file is downloaded go to Arduino IDE -> Sketch -> Include Library -> Add .ZIP Library and look for the ZIP file to be installed. Make sure that the folder containing the “.cpp” and”.h” files is directly inside the Arduino libraries folder. Also don’t forget that libraries in Github sometimes get an update and you may need to change your code for it to work.
Code: Library example – SHT21_Demo
|
1 2 3 4 5 6 7 8 9 10 11 12 13 14 15 16 17 18 19 20 21 22 23 24 25 26 27 28 29 30 31 32 33 34 35 36 37 38 39 40 |
//============================================================================== // E - R A D I O N I C A . C O M, H.Kolomana 6/A, Djakovo 31400, Croatia //============================================================================== // Project : SHT21 Arduino Library // File : SHT21 Demo Arduino Example // Author : e-radionica.com 2017 // Licence : Open-source ! //============================================================================== //============================================================================== // Use with any SHT21 breakout. Check ours: // Shows temperature and humidity from SHT21 sensor in Serial monitor. // If any questions, // just contact techsupport@e-radionica.com //============================================================================== #include <SHT21.h> // include SHT21 library SHT21 sht; float temp; // variable to store temperature float humidity; // variable to store hemidity void setup() { Wire.begin(); // begin Wire(I2C) Serial.begin(9600); // begin Serial } void loop() { temp = sht.getTemperature(); // get temp from SHT humidity = sht.getHumidity(); // get temp from SHT Serial.print("Temp: "); // print readings Serial.print(temp); Serial.print("\t Humidity: "); Serial.println(humidity); delay(85); // min delay for 14bit temp reading is 85ms } |
Result
After uploading the code open the serial monitor you’ll be able to see the temperature in Celsius and the humidity in %RH.

Test 2
In this test we gonna add an OLED screen, here I used 128×64 you can use 128×32 as well but you have to modify the code.

Wiring
Both modules uses 3.3V and i²c interface, so they share all the pins:

Libraries
In addition to the SHT-21 library we have to add libraries for the OLED:
- Adafruit OLED SSD1306 library: Download here from Github or Donwload here.
- Adafruit GFX Library Download here from Github or Download here.
Codes
Here I’ve used 2 different codes, they have little differences:
- The first code displays the (T/H) simultaneously in (°C/%RH)
- The second code displays the T for 2s and then H for 2s in (°F/%RH)
Download the codes from the links, or check below: Download the code 1, Download the code 2.
Code 1:
|
1 2 3 4 5 6 7 8 9 10 11 12 13 14 15 16 17 18 19 20 21 22 23 24 25 26 27 28 29 30 31 32 33 34 35 36 37 38 39 40 41 42 43 44 45 46 47 48 |
/* This code works with SHT-21/HTU-21/GY-21 Digital temperature and humidity sensor and 128*64 OLED screen * It displays the Temperature in Celsius and Humidity in %RH in real time * Refer to http://www.surtrtech.com for more details */ #include <SHT21.h> //SHT21 and OLED libraries #include <Adafruit_SSD1306.h> #define SCREEN_WIDTH 128 // OLED display width, in pixels #define SCREEN_HEIGHT 64 // OLED display height, in pixels #define OLED_RESET -1 // Reset pin # (or -1 if sharing Arduino reset pin) SHT21 sht; //SHT on OLED entities Adafruit_SSD1306 display(SCREEN_WIDTH, SCREEN_HEIGHT, &Wire, OLED_RESET); float Temp; //Here we store the temperature and humidity values float Humidity; void setup() { Wire.begin(); //Start the i²c communication display.begin(SSD1306_SWITCHCAPVCC, 0x3C); //Start the OLED display display.clearDisplay(); display.display(); } void loop() { Temp = sht.getTemperature(); //To get the temperature and humidity values and store them in their respective variable Humidity = sht.getHumidity(); display.clearDisplay(); //Clear the display everytime display.setTextSize(2); //Setting the text size and color display.setTextColor(WHITE); display.setCursor(0,17); //Setting the cursor position display.print("T: "); //Display the temperature and humidity as "T: 24.64 C display.print(Temp); // H: 59.12 %" display.print(" C"); display.setCursor(0,40); display.print("H: "); display.print(Humidity); display.print(" %"); display.display(); //The display takes effect //You can add a delay here to avoid the fluctuations } |
Code 2:
|
1 2 3 4 5 6 7 8 9 10 11 12 13 14 15 16 17 18 19 20 21 22 23 24 25 26 27 28 29 30 31 32 33 34 35 36 37 38 39 40 41 42 43 44 45 46 47 48 49 50 51 52 53 54 55 56 57 58 59 |
/* This code works with SHT-21/HTU-21/GY-21 Digital temperature and humidity sensor and 128*64 OLED screen * It displays the Temperature in Fahrenheit and Humidity in %RH only one of them every 2s * Refer to http://www.surtrtech.com for more details */ #include <SHT21.h> //SHT21 and OLED libraries #include <Adafruit_SSD1306.h> #define SCREEN_WIDTH 128 // OLED display width, in pixels #define SCREEN_HEIGHT 64 // OLED display height, in pixels #define OLED_RESET -1 // Reset pin # (or -1 if sharing Arduino reset pin) SHT21 sht; //SHT on OLED entities Adafruit_SSD1306 display(SCREEN_WIDTH, SCREEN_HEIGHT, &Wire, OLED_RESET); float Temp; //Here we store the temperature and humidity values float Humidity; void setup() { Wire.begin(); //Start the i²c communication display.begin(SSD1306_SWITCHCAPVCC, 0x3C); //Start the OLED display display.clearDisplay(); display.display(); } void loop() { Temp = sht.getTemperature(); //To get the temperature and humidity values and store them in their respective variable Humidity = sht.getHumidity(); display.clearDisplay(); //Clear the display everytime display.setTextSize(3); //Setting the text size and color display.setTextColor(WHITE); Print_T(); //Function that displays the Temperature in °F display.display(); delay(2000); //Wait 2s display.clearDisplay(); Print_H(); //Function that displays the Humidity in %RH display.display(); delay(2000); } void Print_T(){ display.setCursor(0,22); display.print("T: "); Temp=Temp*1.8+ 32; //The value is given by °C here we convert it to °F display.print(Temp,0); //Here since I'm using a bigger text size, I've chosen to display the float variables as integers: Temp,0 means it will display no number after the comma display.print(" F"); } void Print_H(){ display.setCursor(0,22); display.print("H: "); display.print(Humidity,0); display.print(" %"); } |
Results
This is the result for the code 1:

Here is the result for the code 2:
Each of them is displayed every 2s, and I also converted the values to “Int”


Test 3
In this test, instead of using the OLED we gonna use the LCD i²c for the people who have this display…

Wiring
Again all the modules share all the pins:

Libraries
Beside the SHT21 library, we’ll need LCD i²c library: Download the LCD i²c library.
Code
I’ve created one code only, it displays the Temperature in °C and Humidity in %RH, you can modify it to display the °F… Download the Code here.
|
1 2 3 4 5 6 7 8 9 10 11 12 13 14 15 16 17 18 19 20 21 22 23 24 25 26 27 28 29 30 31 32 33 34 35 36 37 38 39 40 41 42 43 44 45 46 47 48 49 50 |
/* This code works with SHT-21/HTU-21/GY-21 Digital temperature and humidity sensor and 16x2 LCD screen * It displays the Temperature in Celsius and Humidity in %RH in real time * Refer to http://www.surtrtech.com for more details */ #include <SHT21.h> //SHT21 and LCD i²c libraries #include <LiquidCrystal_I2C.h> #define I2C_ADDR 0x27 //I2C adress, you should use the code to scan the adress first (0x27) here, it may be 0x3F #define BACKLIGHT_PIN 3 // Declaring LCD Pins #define En_pin 2 #define Rw_pin 1 #define Rs_pin 0 #define D4_pin 4 #define D5_pin 5 #define D6_pin 6 #define D7_pin 7 SHT21 sht; //SHT and LCD entities LiquidCrystal_I2C lcd(I2C_ADDR,En_pin,Rw_pin,Rs_pin,D4_pin,D5_pin,D6_pin,D7_pin); float Temp; //Here we store the temperature and humidity values float Humidity; void setup() { Wire.begin(); lcd.begin (16,2); lcd.setBacklightPin(BACKLIGHT_PIN,POSITIVE); lcd.setBacklight(HIGH); //Lighting backlight lcd.home(); } void loop() { Temp = sht.getTemperature(); //To get the temperature and humidity values and store them in their respective variable Humidity = sht.getHumidity(); lcd.clear(); //Clear the LCD and set the cursor position lcd.setCursor(0,0); lcd.print("Temp: "); //Print the temperature and humidity as "Temp: 23.18 C lcd.print(Temp); // "Humi: 64.13 %" lcd.print(" C"); lcd.setCursor(0,1); lcd.print("Humi: "); lcd.print(Humidity); lcd.print(" %"); delay(1000); //You can modify or remove the delay } |
Result
Here is the result for the test 3:

Thanks to DigitSpace for their sponsorship.
Categories
Yassine View All
Automation and Electrical Engineer, Electronics amateur trying to share my little projects.
Hello, congratulations, very well explained the use of the sensor and the screens.